1 Original plan sketched on a bit of paper. We didn't follow it too closely ! |
 2 Sketch of the pillar construction, the lower plinth would house all power and computer cables and the the height such, that the roof would just be above the telescope in its parked position. |
 3 The new site : On the left the chicken house ( yes, with real chickens ). The white stakes mark roughly the positon of the observatory. Note the rubble in the foreground and tree in the background. |
 4 My original roll off roof observatory. Here being dismantled. |
 5 The contents of the observatory being stored in my garage, along with my car, 3 motorbikes, a 20" Dobson and numerous other stuff. |
 6 The old observatory being relocated |
 7 New foundations, old observatory |
 8 New foundations, old observatory |
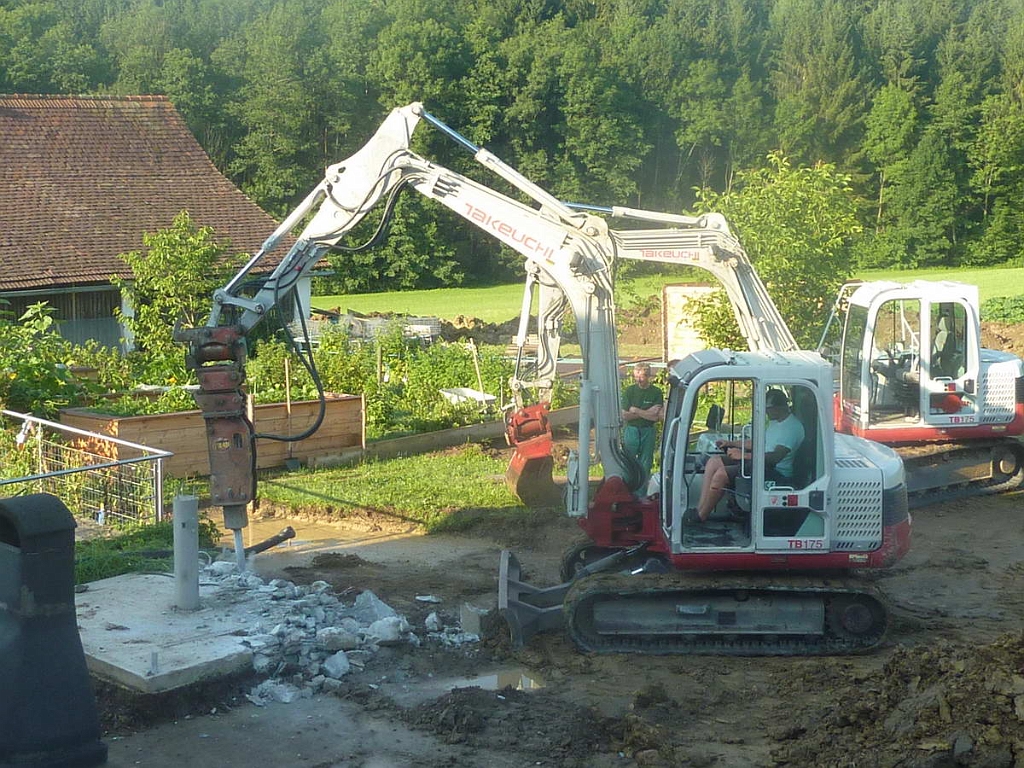 9 Old foundations being dug up |
 10 The original pillar from old observatory - it served well and got a decent burial |
 11 Yes, that walnut tree was in the way ! |
 12 New site after initail clearing |
 13 Base for foundations dug out more than 100cm deep and leveled off |
 14 Then a stripfoundation 50cm deep and 40cm wide was dug out. Note, in the middle is an second foundation for the pillar, this was 150x150 cm an nearly 200cm deep. |
 15 Strip foundations, in the background some of the nearly 200 tons of earth removed. |
 16 Concrete Day ! We had 5 differnt building sites ongoing and did all the major conreting in one day, using more than 100 tons of concrete. Here the pump lorry pumps concrete over the chickeen house to the foundations of the observatory. |
 17 The finished strip foundation - just the beginning |
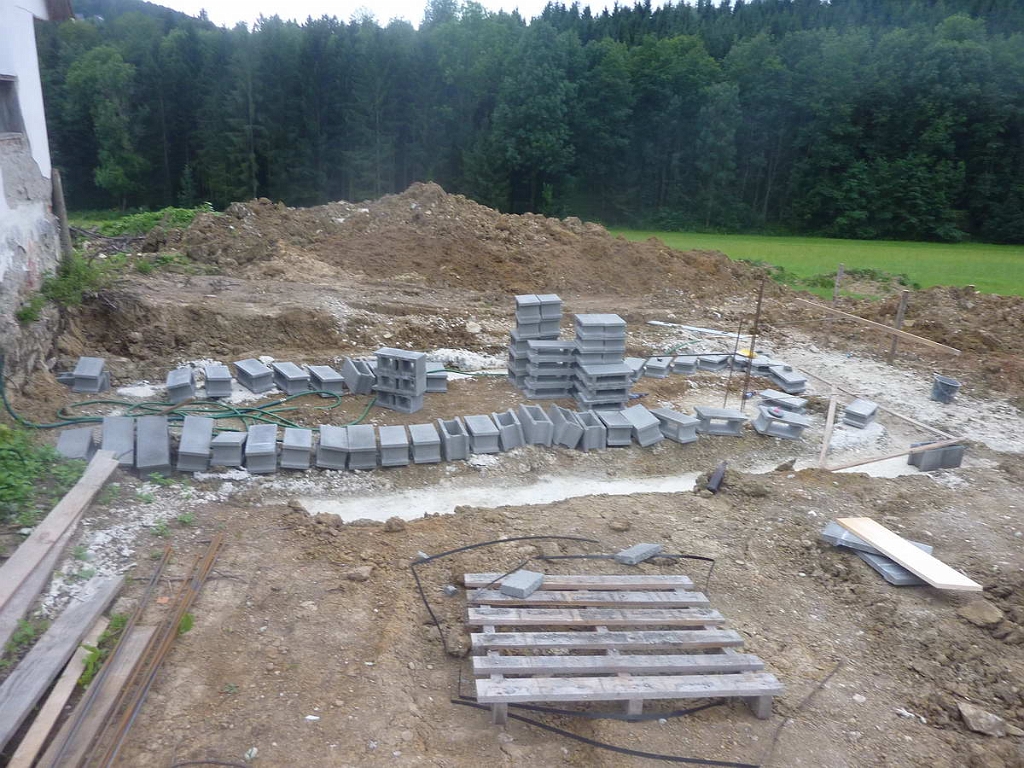 18 The strip foundation was then rebuilt upto ground level with blocks, a height of almost 150cm |
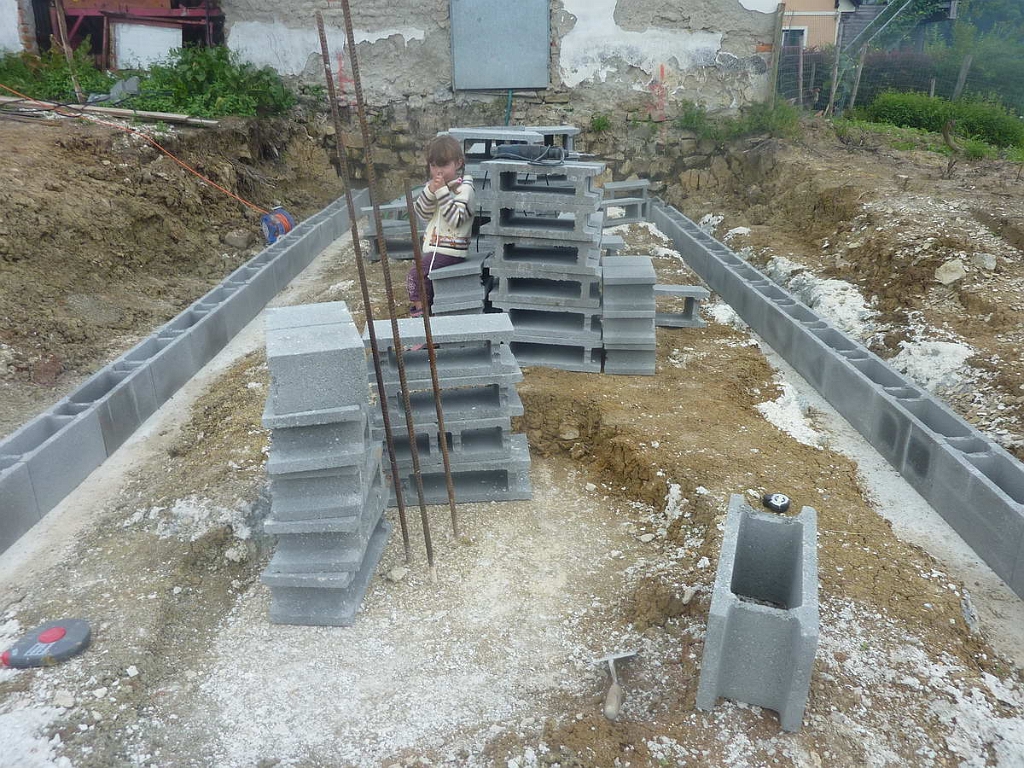 19 First row of blocks and the central pillar foundation |
 20 The upper side was levels off with concrete |
 21 One can see here the real depth of the foundation - ground level is where Maria is standing and the foundations go 50cm below the course of blocks |
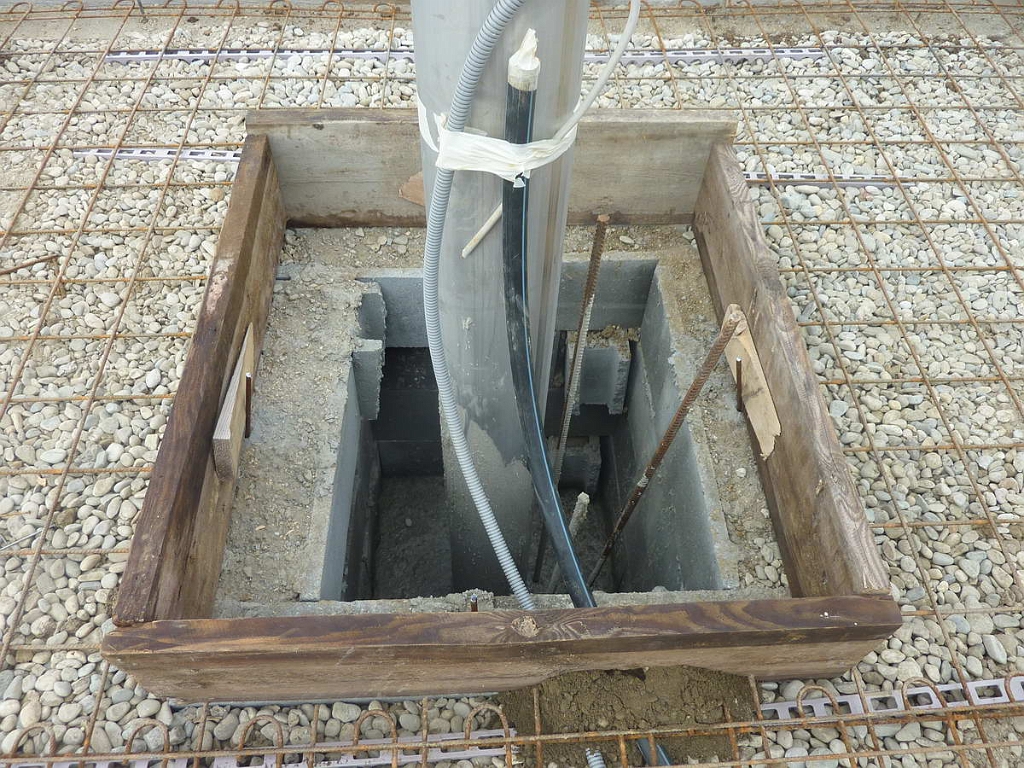
 22 Innovation : this tube is for cool air circulation. Air will be drawn in here, travel about 10m deep underground and be cooled before being blown out in the observatory. We don't know if it will work, but we will try it out. |
 23 The central pillar. This is seperated from the main foundations and goes a further 150cm into the ground. |
 24 Base foundation almost complete after two long days work |
 25 The old pillar being layed to rest |
 26 Left - old pillar, right - new pillar |
 27 Inside of foundations filled back. Here one sees the outlet of the cool air tube |
 28 Arnold with the main pillar, it is 300cm long |
 29 Myself setting te main pillar in place |
 30 |
 31 Power and computer cables layed underfloor, just to keep things tidy. Main floor is steel reinforced. |
 32 A final look into the pillar foundation before being concreted. The wooden shawing seperates the pillar from the main floor. |
 33 Floor and pillr being concreted |
 34 Floor being layed |
 35 Delivery of wood for the building, all larch - very weather resistant |
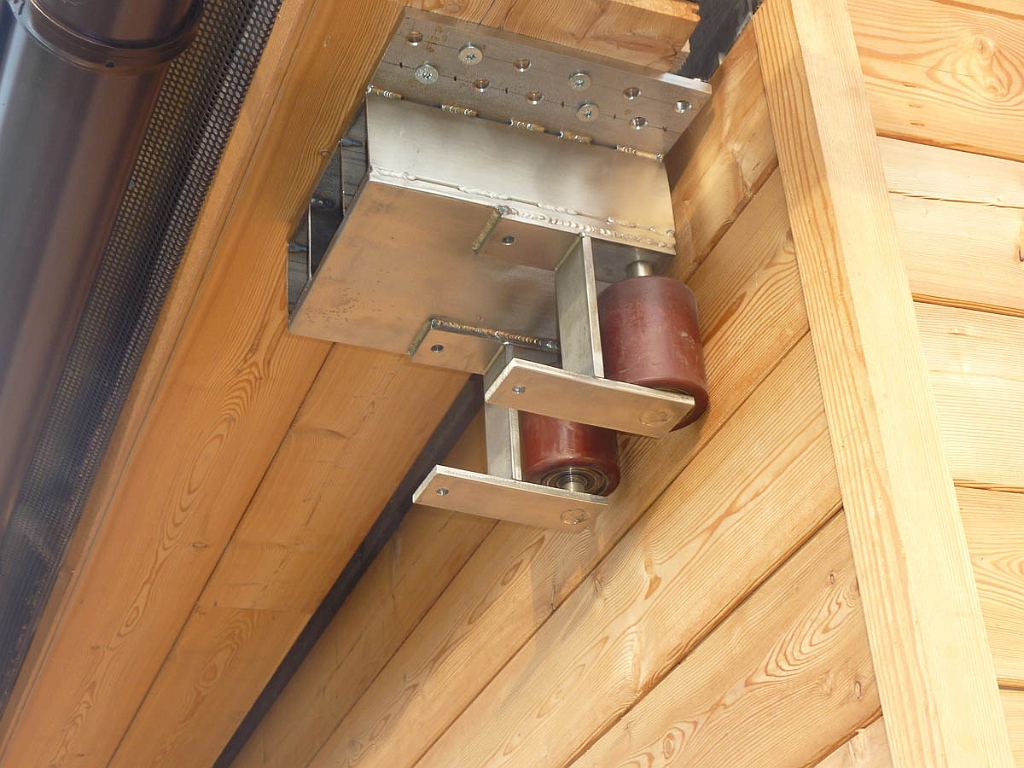
 36 The main roller assembly for the roof - these are used for aircraft hanger doors. |
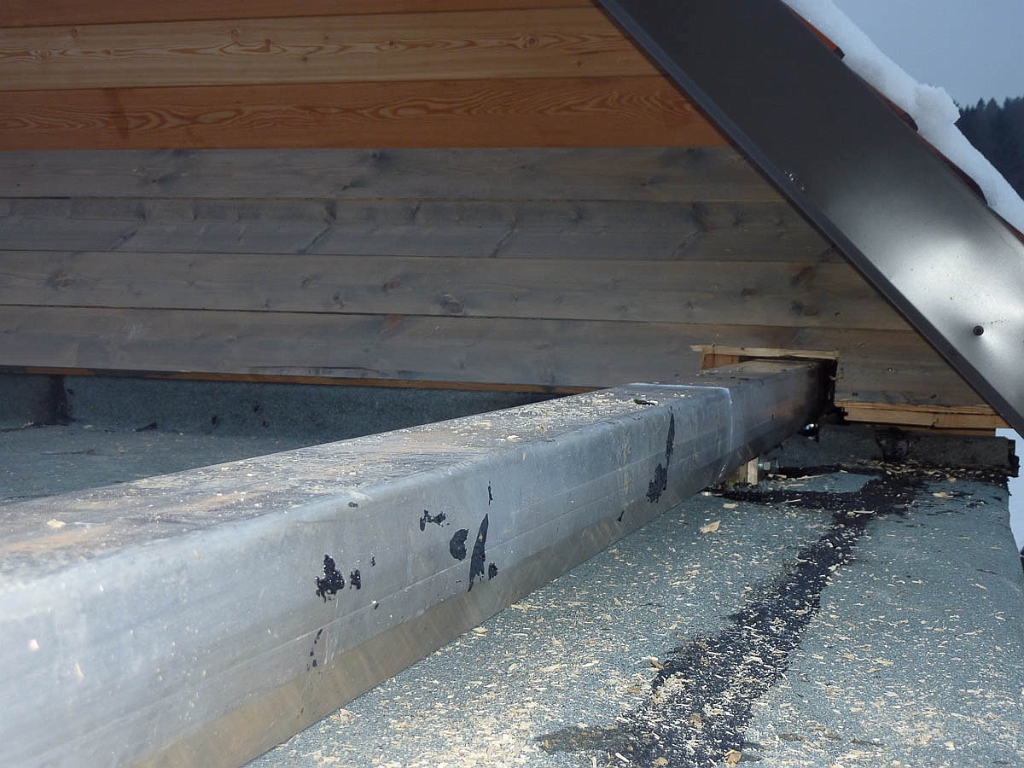
 37 One of the two roof rails, aluminium |
 38 Finally the building proper begins. Left the annex building with rollers in place |
 39 The base is dampcoursed. Here the skeleton of the building and main pillar |
 40 Roof rails |
 41 |
 42 Observatory ( right ) and roof begin to take shape |
 43 Roll off roof |
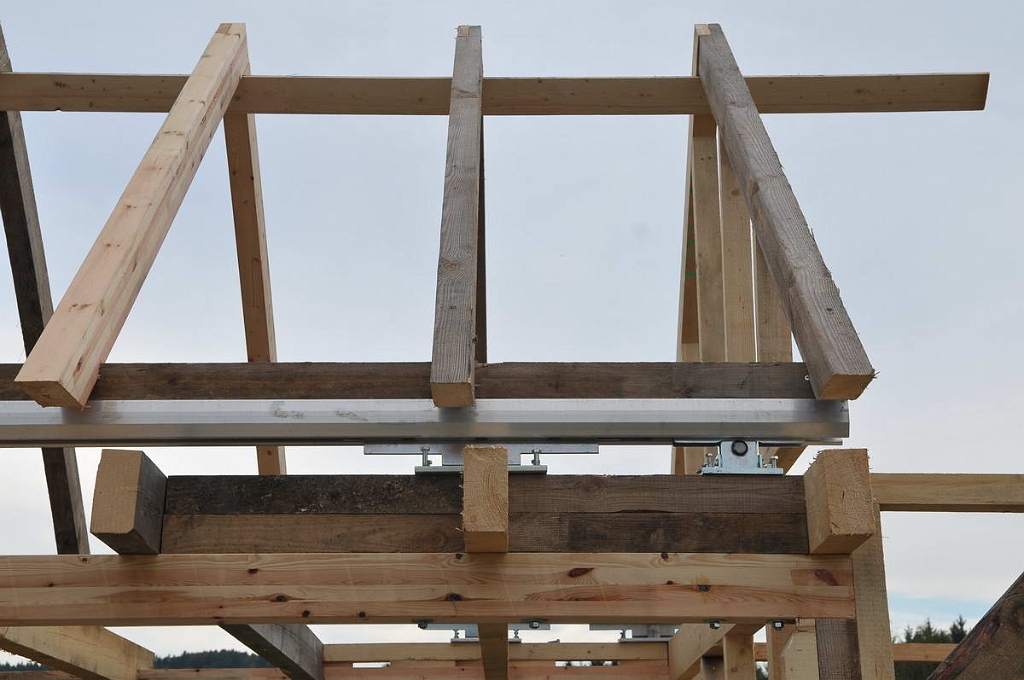
 44 Rail construction - very sturdy, the roof weighs more than 3 tons ! |
 45 Roof takes shape |
 46 The walls are covered with a humidity blocking membrane. The roof is double walled allowing air circulation which prevents excessive heating up in summer |
 47 The annex ( left ) uses many recycled windows from the old house. |
 48 Larch paneling |
 49 Roof is tiled - the tiles are 100 year old hand made clay tiles and the same as on the adjoining building. We try to keep everything looking consistant with a rural setting |
 50 The almost finished building next to the chicken house |
 51 The almost finished building next to the chicken house |
 52 Interior of the observatory. The pillar foundation at ground level is still almost 100x100cm. Here the concrete is leveled off and keep seperated from the main building |
 53 The pillar at ground level |
 54 Due to the height of the building, nearly 3m, we decided to put in a false floor |
 55 Plinth surrounding the pillar is now 60x60cm and about 50cm above the false floor level |
 56 Base inulated, in the far left is the air intake for cooling |
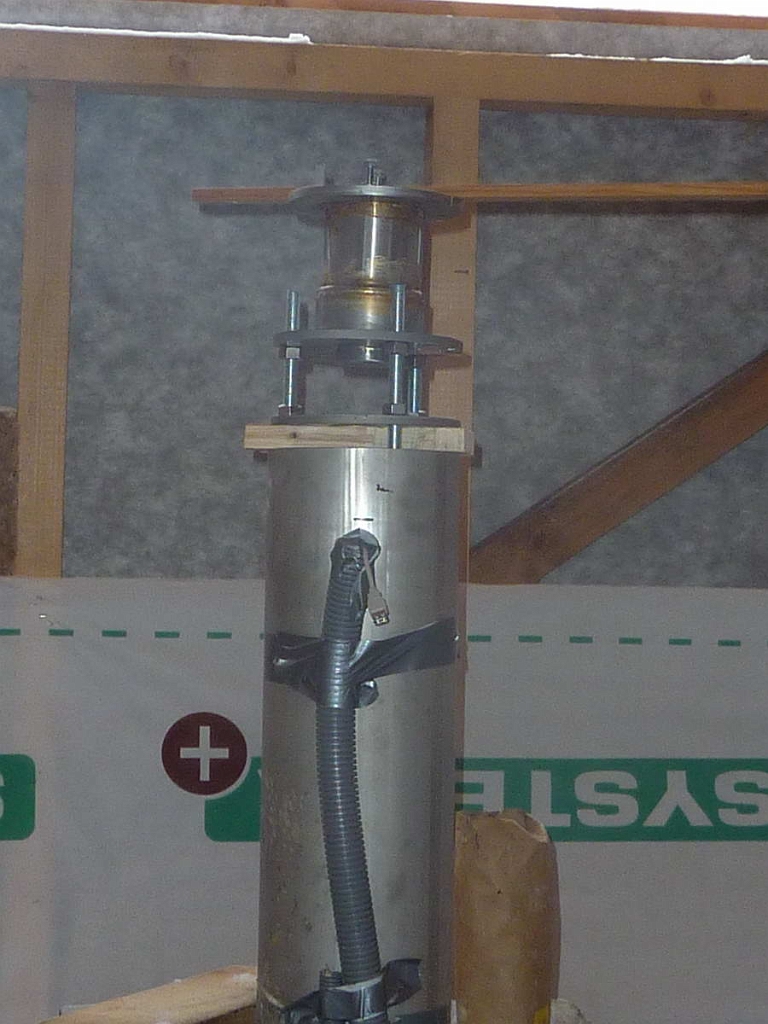 57 Finally the mount adapter plate is temporarily fixed. Before finally concreting in place, this must be perfectly aligned to the north |
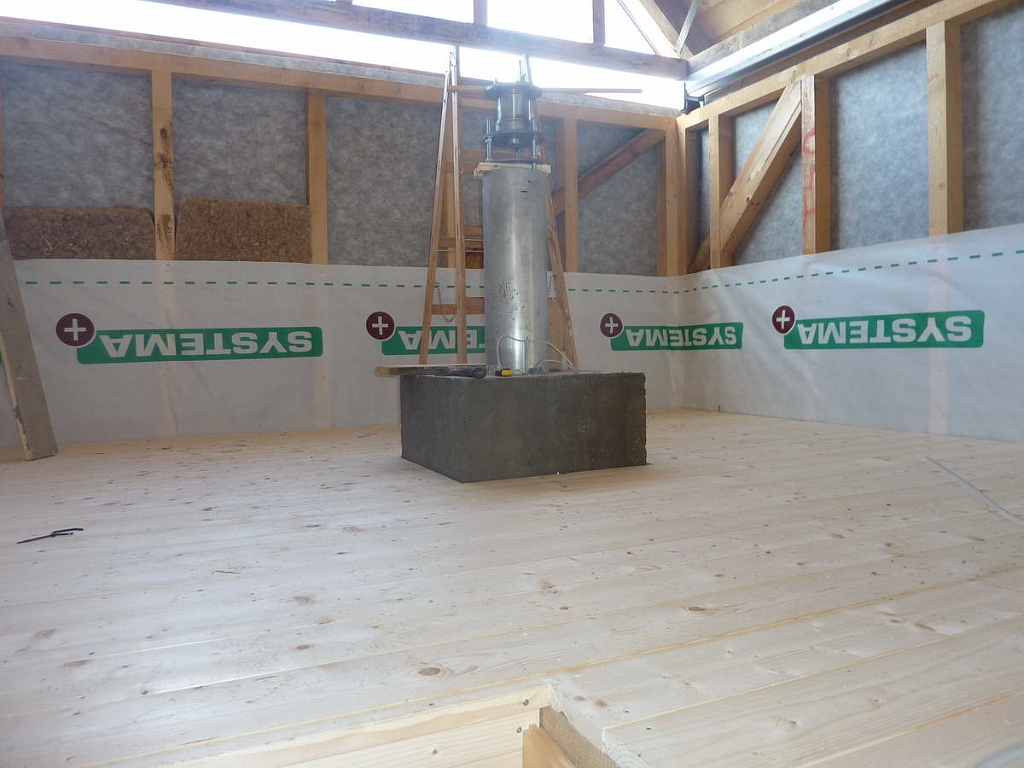 58 Completed floor, plinth and pillar |
 59 Stairs at entrance |
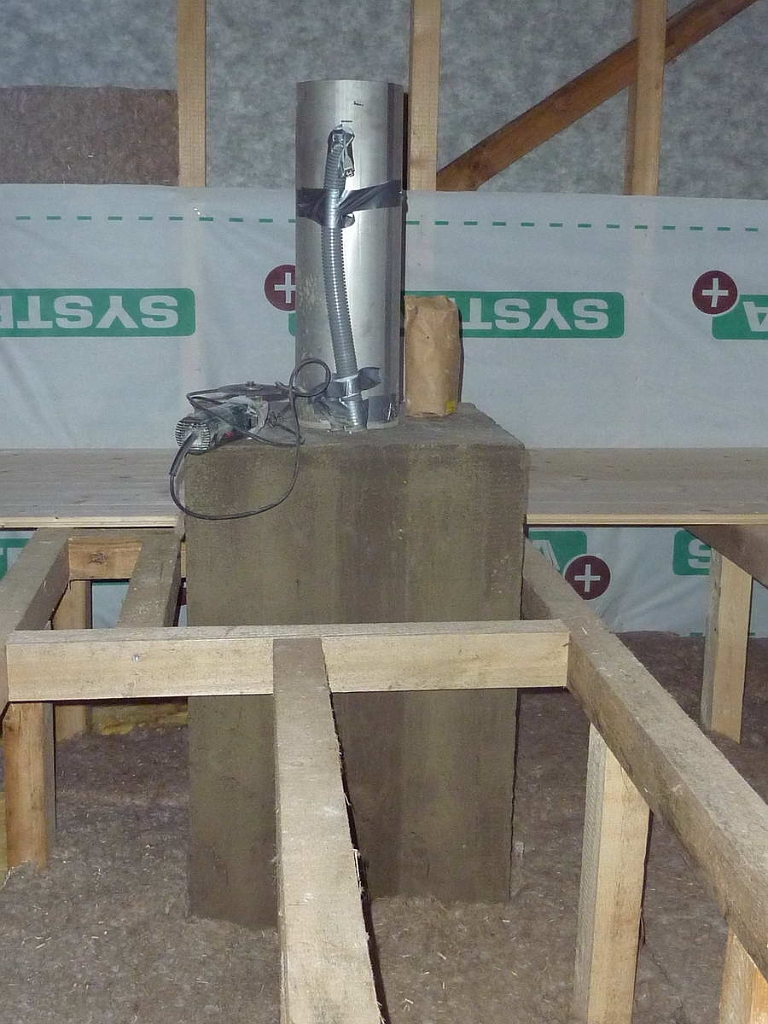
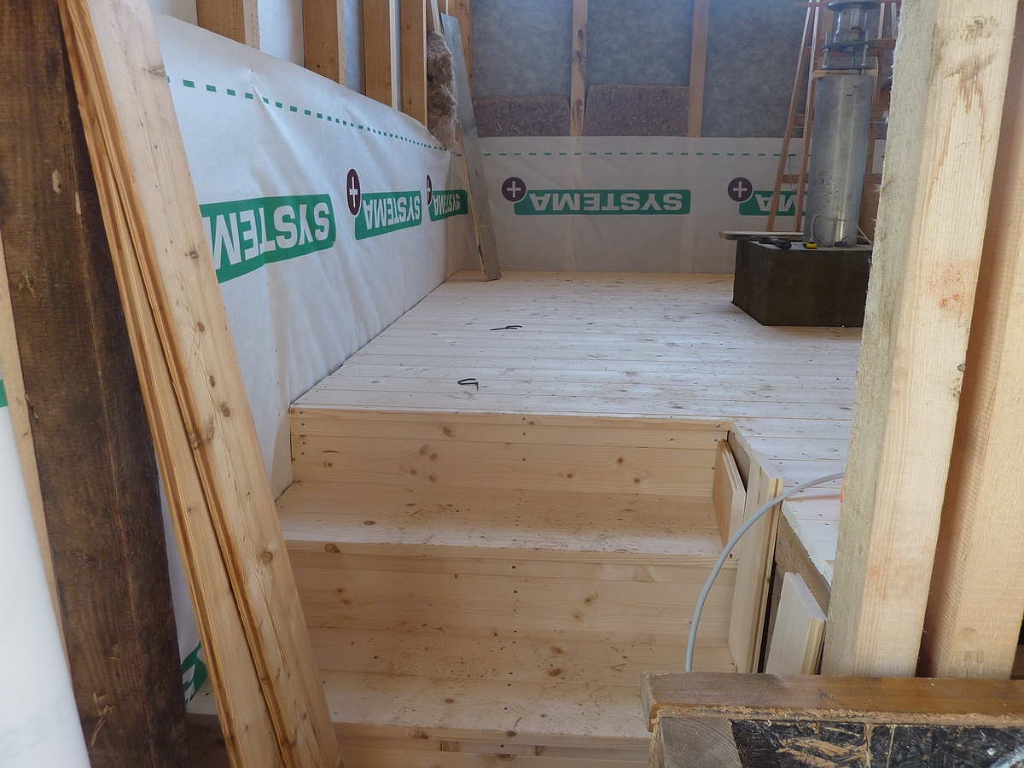
 60 Cool air exhaust. |
 61 View of almost completed interior from the annex |
 62 At long last the mount is installed |
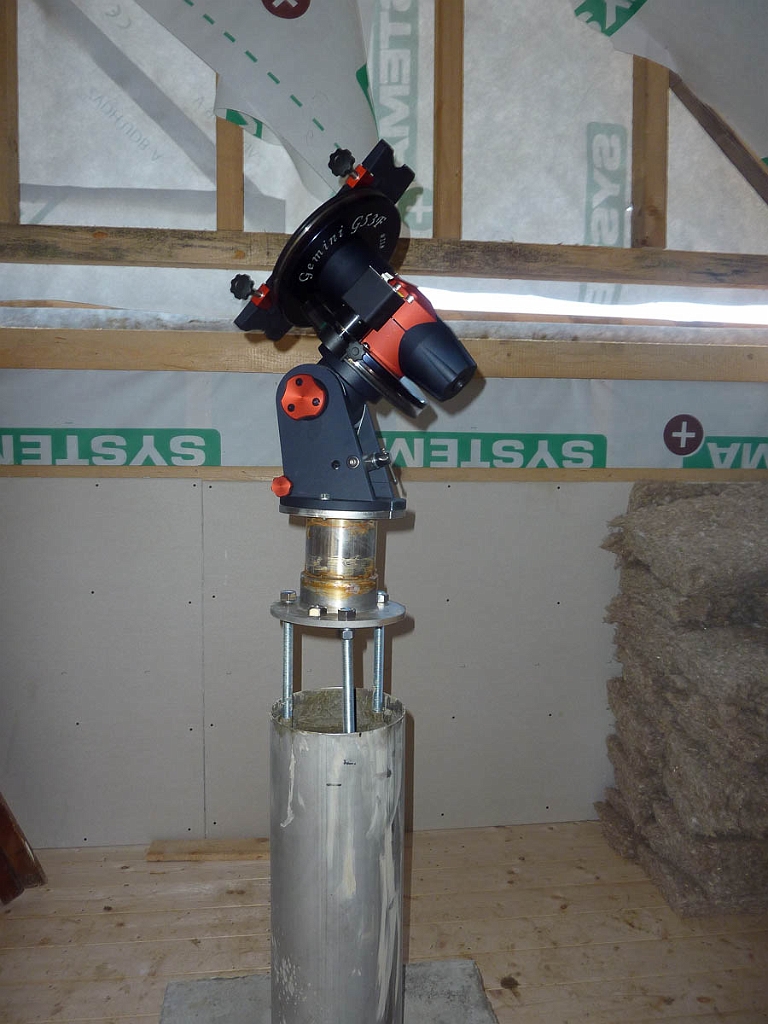
 63 The annex room takes shape |
 64 Lessons learned, all the electrics neatly placed on the central pillar, no more cable salad ! |
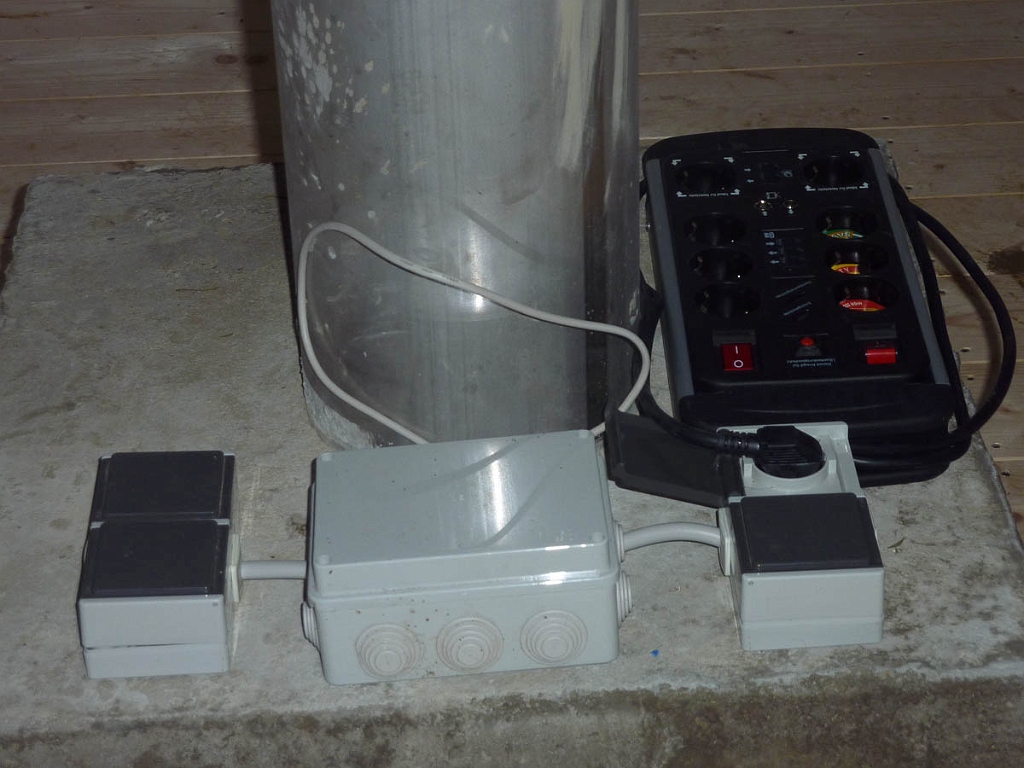
 65 Due to problems with the roof, we extended the rails |
 66 First ( manual ) opening of the roof |
 67 A motor is installed, initially operated by a makeshift plug, which had to be pushed in and out and poled to change directions |
 68 Beneath the rails for the roof, the cog system |
 69 Additional roller to support the weight of the roof, almost 5 tons |
 70 Piece by piece the instruments are added and the electronics become more complicated |
 71 Telescope, main and guide cameras, mount controler and motor focus installed and wired in. |
 72 The outside of the observatory, with flashing and gutters installed |
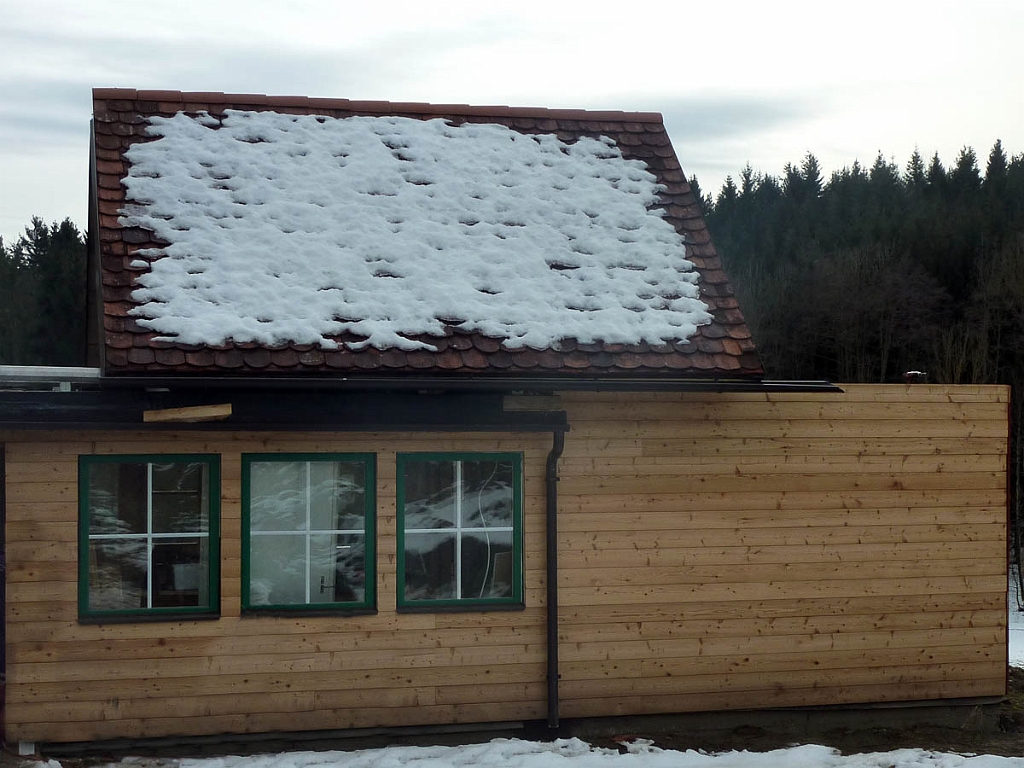
 73 Roof of the annex, here the support rails for the roof |
 74 The annex takes shape, the walls are insulated and will be finished with plasterboard |
 75 A view to the east, the entire building is made of larch - very weather resistant and blends in with all the farm buildings |
 76 Plasterboarding in the annex completed |
 77 A door from the annex to the outside |
 78 The annex and door to observatory |
 79 The finished interior, work table with power supply and connections to instruments and internet, a cupboard to store stuff, a laminate floor to ease cleaning |
 80 My trusty ladder, a must in every observatory |
 81 Controller for motorised roof installed ( this was kindly built for me by a friend ) |
 82 Controller for motorised roof - I actually wired it up myself, but Michi, who built it, made sure it was really idiotproof |
 83 Again due to problems with the roof, we added on guide roller to the sides, to stop the roof being piulled out of alignment |
 84 Trench for the LAN cable, laying this was not so easy |
 85 At the end of this trench is the World-Wide-Web |
 86 Endswitch for the motorised roof, not it operates automatically. |
 87 The finished observatory with the newly built chickenrun, yes, we do have real chickens ! |
 88 The finished observatory. The annex to the left is used for presentations and also as a music room for Hannes, who is a drummer. |
 89 The business end of things, this setup is used exclusively for astrophotography |